Tuesday, 21 June 2011

273 Assault Craft Homemade Aquila

Well now.


I've been too tired to paint this week, but your justifiable clamour for an aquila on the front of my assault craft's ramp (or prow) is something I could do. Cutting out the 'proper' aquila is really tricky, and near impossible to get symmetrical , so as with the rest of this project, it's designed to:


  1. be relatively easy to do (this almost exclusively follows straight, geometric lines)

  2. require minimal tools (ruler, pencil, knife)

  3. keep material cost to a minimum (it's from what would otherwise have been wasted plasicard). Here it is:

If you're wondering about the streamline moderne look, its inspiration lies in the actual WH40K logo itself. Different pics below, including sketches, next to my trusty 'Irwin' knife (with which I do all of my cutting(!) - it takes Stanley blades)...


- Drax.

Sunday, 19 June 2011

272 Assault Craft Initial Concept Sketches

Afternoon, All,


I did say I'd share these, and as the cutting plans aren't quite ready yet, here they are to tide you over. You can see the genesis of the idea as well as some weird little tangents, some of which really didn't make the cut! These are scanned from my latest working notebook (The Sixth Book of Arcane Scribblings):


- Drax.


Thursday, 16 June 2011

271 Grim-Dark Peacekeeping? (Progress Shots)

Hi All,
Just to keep you updated, here are four pics. The first is at my wife's suggestion upon seeing the project in its white form, and the others are in order to prove that (a) I am painting it (yes, basecoats of Dark Angels Green always look rubbish under a flash!) and (b) having received the textured plasticard, I've done the treadplates in the bottom. There are a couple of bitz in the last pic too:

- Drax.

Monday, 13 June 2011

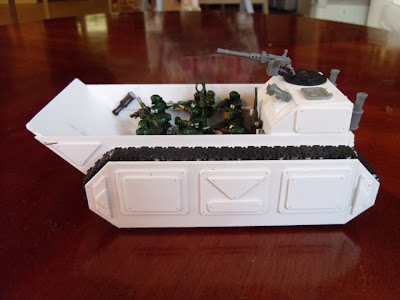
270 Assault Craft Construction Complete!

Hi, All!


I've completed the construction of the assault craft - the pics are below. Remember that the aim of this project is to keep the concept and execution as simple, cheap and straightforward as possible: even the new twiddly bits are pretty basic. Sorry for the quality of the pics, but you get the idea:


C&C appreciated as aye,


- Drax.

Sunday, 12 June 2011

269 Dinosaur Safari Time!


Hi! I was due to be out of town, so I put this together on Friday.


Essentially, I was amused by a wheelie-dinosaur bring spotted in a recent post, and my 19 month-old absolutely loves dinosaurs at the moment...so I thought I'd take you on a brief, non-GrimDark safari of the dinosaurs surrently residing in the living room/kitchen of our little cottage.


Look out for inlfatable 'Dan', 'Spot' the wheelie dinosaur, the dino coat, 'Rex' who was a well-loved dog toy but who has recenly become a firm baby favourite, the two knitted dinosaurs, and the bath dinosaurs. Just for fun, eh?!


- Drax.

Friday, 10 June 2011

268 Oh, Alright Then - A Hinged Assault Ramp It Is...

So I caved.


Having worked out how I'd do it (simply and cheaply) I couldn't resist attacking the assualt ramp of my vehicle and making it lower.


Dead easy: all you need for this stage is the trusty 1mm pin vise bit, a bit of sparky tape (electrical tape - I like its faint elasticity), clippers and a paperclip. The pics tell the rest of the story, and there've been more deatils added since then too:


Cheers!


- Drax.

Sunday, 5 June 2011

267 Assault Craft - Detailing Begins

Hi, All - and I hope many of you had fun at Blogwars today: very sorry I missed it.


For those of you following my current project (see label, below) I got some more work done last night. In an attempt to keep the detailing as straightforward (cheap and really frickin' easy) as possible, I'm trying to concieve some really simple, repeating motifs that can be whizzed out of the 1mm plasticard. So far it's all based around identically-sized rectangular hatches and (yet again) right angles.


Again, because I (and other modellers) find rivets a pain in the backside, I've opted out. Instead we have the Drax approach for a very similar effect: standard GW pin vise 1mm(?) holes! Here's the pics - no further notes as I have work to do, but I'd be delighted to answer any more questions (obviously, there's more work yet to do, and the pics are work-in-progress):


The inside of this hatch is actually straighter - this was just held briefly in place!


Cheers,


Drax.