Hullo, All.
Another week; another game. I have never ever been able to game this regularly in my life, and it's doing me the power of good.
Last week saw me siding with Guy and facing off against previous foes (and sometime allies!) Alex and David at the club - we were playing Heer, and they took an Allied force of British Paras and US: 2000pts/side comprising four separate 1000pt forces.
With a variation on a mission from the main rulebook, the set-up was that the Paras were surrounded in the middle of the table and the Americans had to play 'cavalry' and come in to their rescue. This was quite a tough ask for the Allies, but they had a hefty amount of veteran troops and the classic Brit-artillery-plus-US-double-airstrike hurt to bring against us, and with 'victory' dependent on units killed, we had more on our side for them to bag...
 The table was really good fun: it became (á la Market Garden) the edge of a Dutch town, and I was persuaded to dig my old windmill out of its dusty retirement in the club's scenery store...
 |
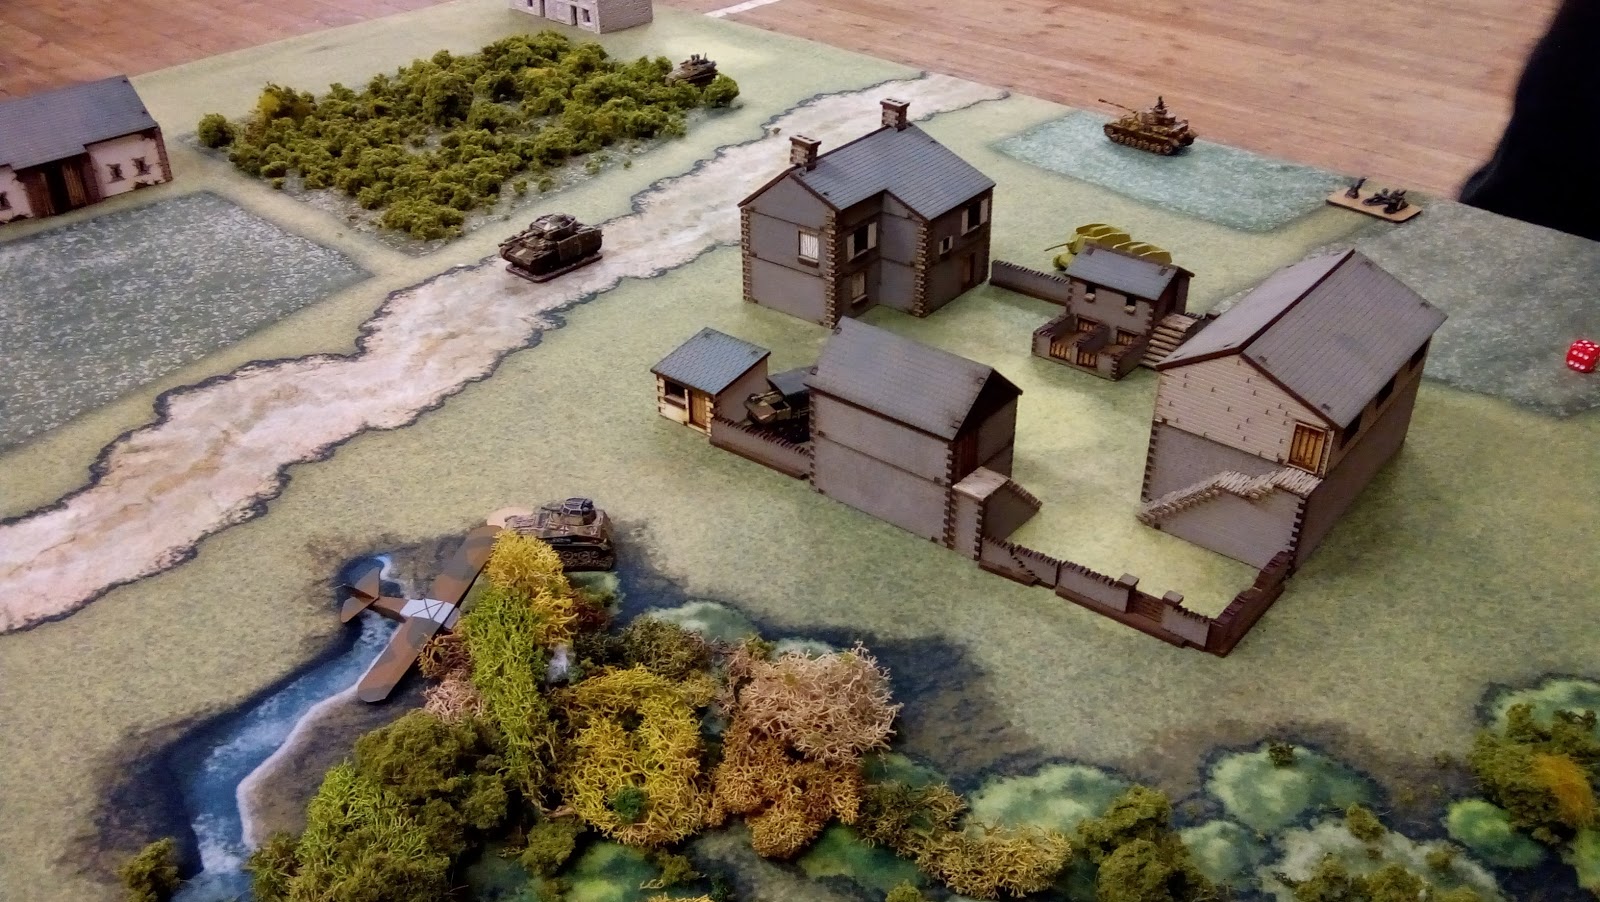
| The Paras are in the block bottom-right |
...so this provided a lovely rural contrast to the sprawling industrial site at the other end of the board - too big, incidentally, to easily capture in one pic!
Well, the Paras set up in a 24"x12" area plum-centre (with the US due to arrive from turn 2 onwards) and we set about entering the table to bring the fight to them...but 'hidden' veteran troops in hard cover on ambush make for tricky shooting, and all we managed to do was to put a couple of pins on one unit, whilst the Para sniper managed to destroy Guy's MMG team as it sprinted across to the factory to set up. First blood to the Allies.
 |
| Paras. Double-hard bastards to kill. |
This first blood was quickly followed by yet more claret, as the British artillery barrage came down accurately in turn 2 and obliterated my poor, not-so-innocent Nebelwerfer team. Boo.
2-0 to the Allies.
So we had to strike back, and strike back we did. Guy's Nebelwerfer (yes - we took two) opened up on the tightly packed Paras with surprising and gratifying success and - although they were hard to kill - we started laying down pins on the Paras.
At the same time, the Americans were arriving on the board, but bizarrely, they drove in M3 half-tracks right into the open space before our tanks had even entered! Mindful of the threat posed by a British Comet (a little out of whack for a Market Garden setting, but everyone was fine with it), our two Panzer IVs edged onto the board and started laying down hurt and pins on the half-tracks, blocking the road with one and killing its heavily-pinned occupants before my Panzer IV was itself knocked out by the Comet's first round. Drat.
The destruction of that first half-track though, was great, as it killed the US officer AND their air observer in addition to the vehicle itself, and the veteran engineers within were forced out and 'down', badly depleted*.
Now came the turn of the tide. From this point on, the Allies were on the back foot. In a thoroughly cinematic way, the Paras were holding fast but just couldn't get rid of their pins, and the American rescue mission had ground to something of a halt - equally cinematically, their commander declared at one point (and here I paraphrase), "Forget rescuing the British!"
After this point, and for the following four turns(!) all hope of victory was essentially abandoned by the Allies, but to their considerable credit they battled on regardless. I've never seen veteran troops whittled down to destruction by pins before, but it happened here, and in the end - after a desperate attempt to assault their way out - the Paras were wiped out to a single man: the now impotent but surprisingly resilient artillery observer...although their Comet survived, albeit pinned and reversing.
 |
| The Lone, Brave FOO |
For the remainder of the battle, it was really just a matter of mopping up. It'd seem almost churlish to detail the many and varied ways in which the Americans were pinned, gunned, or assaulted into oblivion, but the highlights for me included the following:
- One of my Grenadier squads surged forward to assault and wipe out the US Engineers before shooting a couple of grunts and damaging the Hellcat with a Panzerfaust;
- Guy's sniper team wiped out the US bazooka team with an impeccably timed shot, and
- My Panzerschreck actually (finally) killed something: after chasing the Comet, the Hellcat reversed into view, so the team swung round and popped it. Kaboom!
 |
| Taking the fight to the American Engineers |
 |
Meanwhile, on the side of the windmill, another Heer squad
fend off the last attack of the GIs. Desperately unlucky. |
In the end, the Allies pretty much just disintegrated, and the final score was a shocking 12-3.
The game was a slaughter, and I felt bad for the poor Paras, but it looked absolutely beautiful on this table, and the Americans were a little bit out of practice with Bolt Action, so we can forgive them getting carried away with the cool-looking mounted advance. If the Allied reinforcements had either spread out more or maybe even surged against our left flank across the paved surfaces, we would have struggled a great deal more to concentrate our fire.
Luckily, they didn't.
Big shout-out to Dave, Alex and Guy for a fun and pretty-looking game...and here's to the possibility in the near future of a Market Garden at the club over the coming months...!
TTFN,
- Drax.
*Note to self: don't load up a transport with three high-value targets and then advance it in the open toward the enemy guns.