Wednesday 29 October 2014

471 - Flames 11AD Infantry Company (4KSLI) FINISHED AT LAST!

Yup - the title says it all: I've finally finished my Flames of War LW 11th Armoured Division Infantry Company (4 King's Shropshire Light Infantry) with attached support for Op. Market-Garden. Yay!

For once in my misbegotten life, I actually tried to set up something approaching some decent lighting in my kitchen - the least dimly lit corner of my damp and dingy cottage - but it didn't really work, so I've used the dreaded 'autocorrect' on some of these pics, I'm afraid. Sorry! Anyway, onto the pics (many of which are larger than usual, if you'd like to open them in a new tab)...
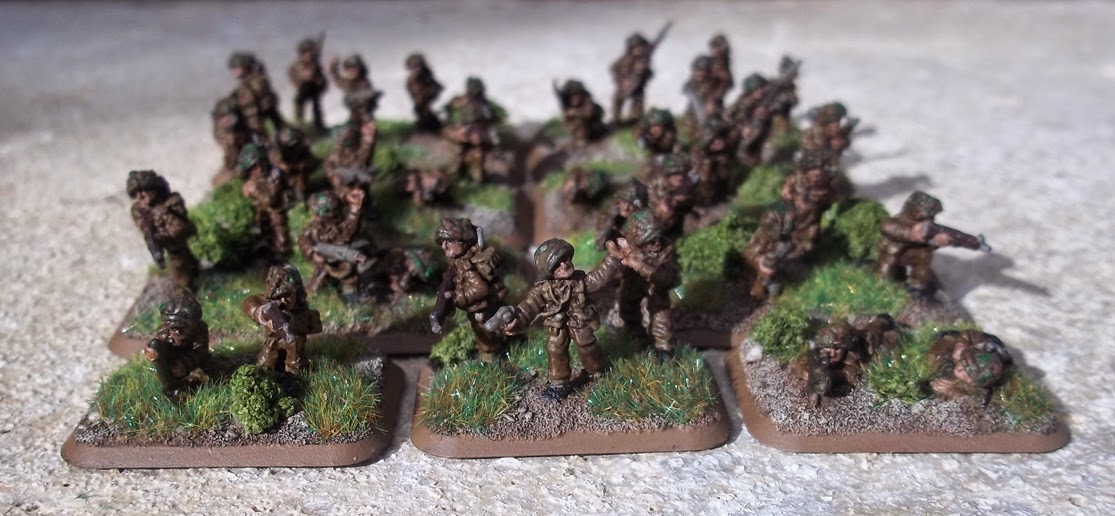
[above] - "Group hug, everyone!"
[above] - By the left...
[above] - ...by the centre...
[above] - ...and by the right. Now onto the composite units.
[above] - the converted Carrier Platoon and the Anti-Tank Platoon (6pdrs; (late))
[above] - 1 Platoon (previously 3 Platoon but better painted)
[above] - HQ, 2i/c and the slightly frosted (grrr!) 2 Platoon.
[above] - 3 Platoon. Actually, I've just thought that I might in fact swap 2 and 3 Platoons in future. It makes no difference, of course, other than in my head!
[above] - 3" Mortar Platoon
[above] - And so, onto the back row. This is the 4.2" Mortar Platoon, courtesy of  2 MG Coy, Royal Northumberland Fusiliers  
[above] - 1 Troop, A Squadron, 3RTR
2 Bofors 40mm S-P Anti-Aircraft Guns from 75th Light AA Regiment
[above] - 2 Troop, A Squadron, 3RTR
[above] - a Gun Troop of four [ridiculously underpowered] 25pdrs from 151 Ayreshire Yeomanry, RA
[above] - Look to the skies! An RAF Typhoon and an Army Auster AOP (scratchbuilt to scale before I realised that planes aren't usually to consistent scale in Flames...)
[above] - The Thin Olive-Drab-and-Khaki Line
[above] - "Er...Charge?"
[above] - "Yup - CHARGE!"
Hobby-wise, I could scarcely be happier - thanks to those of you who've followed me through this long and drawn-out process - especially for all of the reassuring and encouraging comments along the way!

Next stop: NORTH AFRICA*!

Cheers,

- Drax.
 
[*Actually, that's not true. the NEXT-next stop is actually painting up some new Shermans to replace the Yankee ones you'll see in the pics above (they will be shipping to North Africa) and so that I can field an Op. Overlord list for 11AD. But that's a detail, right?]

Monday 27 October 2014

470 - X-Wing Game 4 - 'Test Flight' Scenario (300pts)

A simple mission and scenario were called for in order for us to play with some more of our toys, so here is what we came up with (don't worry, the main bit's pretty much all pictures)...

SCENARIO:

Colonel Jenden of the Imperial Fleet is on 'sea-trials' - watching ace pilot Rexler Brath putting a brand new TIE Defender through its paces against the drifting old hulk of an Rebel transport, when his personal escort of three more aces (led by Carnor Jax) in TIE Interceptors...er...intercept a signal from an approaching Rebel flight.

Jenden makes an executive decision: what better way to see the capabilities of the Defender than by seeing it in action against the Rebel scum? To that end, Brath is sent off to do just that before flying back to base, and as Jenden heads out of the asteroid test field his escorts sweep around to help Brath out, 'running blocker' for the shuttle. Just in case, he also patches a call through to Bobba Fett, who happens to be nearby, sparring with some TIEs.
Meanwhile, Rebel Captain Illyn Roche is feeling vulnerable - it was just suppposed to be a straightforward route out to a straightforward interdiction mission: three aging Y-Wings quickly in-and-out with the hope that his escort of four equally creaky Z-95s wouldn't run into anything too powerful - this asteroid feild was usually deserted, after all. Oh well - the mission'll have to change, because a Lambda-class shuttle can only mean one thing: tob brass. Even if he dies trying, Roche knows he'll have to try and destroy it...but to be on the safe side he sends out a call for reinforcements too: Red Squadron's supposed to be around here somewhere.
Heaving a world-weary sigh, Roche sets his jaw and drags the stick over to starboard. The comms crackle into life: "Grey Squadron? Systems arm; attack formation. Line astern on me. Tala Leader? Stay close and look alive - I've got a bad feeling about this one. Hey! What the-- Tala Leader: can you some of weird ship over to port--?"
MISSION:

IMPERIALS: (1) TIE Defender is to destroy at least two Rebel ships to prove its worth before escaping out of the asteroid field (2) Lambda shuttle is to escape out of the asteroid field.
REBELS: (1) Destroy TIE Defender (2) Destroy Lambda Shuttle.

FORCES:
DEPLOYMENT:

NB: Because we were winging this scenario and had no idea how the reserved would work, we just put the kitchen timer on 35 minutes and agreed that the reserves would all come on from their appointed zones in the turn after the alarm.


HOW IT TURNED OUT:
[above and below] Battle is joined - a Z-95 is already space-junk!
[above] Imperial reserves arrive, en masse...
...and in a quadrant far, far away, so too do the Rebel reserves. Full throttle needed, methinks.
[above and below] The lines merge
...but what's that crazy Headhunter doing on the right flank?
[above and below] That's right - in an act of desperation, the last Z-95 flies stright into the midst of the Slave-1-and-Howlrunner TIE Swarm. Amazingly he survives to fly out the other side in the next turn.  
[above] Those Y-Wings really ought to do something about that shuttle, right?
[above - shuttle internal comms:] "Palpatine's teeth, Tarquin -hoist the bloody wing up quick - one of those blasted Acadamy pilots is about to hitch a ride!"
[above] Long shot of the climax
[above] IT'S OVER - the Defender is destroyed, but the Lambda shuttle just sqeaks away out of the asteroid field. It's a draw: 1-1.
[above] Objects inn the rear-view mirror are more terrifying than they appear.
[above] An enjoyably cinematic stand-off; detail below:
Brilliantly, in the closing stages, that rogue Z-95 swung round at the back on the right flank and survived the Firespray's rear fire to plant an assault missile right squack up its jacksie, damaging everthing in Range 1, including the luckless Roche in his now-limping Y-Wing. 
  THOUGHTS:
  1. The scenario worked really well and looked absolutely beautiful on DS's new 6x3 space mat. I'm glad it fought through to a draw, although I don't think the rebels could've held out much longer...
  2. I love the term 'Space Mat'.
  3. Ion canon are every bit as awesome as I hoped they would be: in fact, of the just three ships I destroyed, both the Defender and the bastard Carnor Jax were destroyed whilst 'ion'ed, and the Academy TIE was destroyed by an ion cannon. Brilliant. If I'd thought more tactically, I could've forced the Shuttle to miss its exit too, although that would've been a wee bit too gamesmanshippy for my liking...
  4. The TIE Defender has a lot of potential. I still absolutely hate TIE Interceptors.
  5. I love Z-95s! They're pretty damned squishy, but they are very characterful little ships, and missiles seem to be sooooooo much more fun than torpedoes in this game.
  6. I realised about ten minutes in to this game that Assault Missiles are brilliant...unless, of course, you also happen to have friendly ships within Range 1 of the target ship. Oops! Obviously, with the Large shuttle to control and destroy I could've been advised to take Ion Pulse missiles, but 'going' prepared' wasn't the idea of this scenario, and would've been rather disingenuous of me: the ships were all just given a 'standard' load-out.
  7. I love Y-Wings every bit as much as I thought I would: they're slow and clunky but they can at least soak up a good few hits. The Y-Wing is the Volvo of the Rebel Alliance.
  8. To my surprise, Nera Dentels aquitted herself well in the B-Wing [her? him?] and was actually responsible for finishing off both the TIE Defender and the bastard Carnor Jax. Nice work, Dantels.
  9. Darth in his TIE Advanced did absolutely sod-all; Slave 1 was also surprisingly meek...although by the time they arrived, DS and I were both utterly exhausted from an improbably hectic week at work.
  10. When they came on so far away from the action, I thought my reserves would be absolutely useless. As it happened, they did more-or-less just what they were supposed to, so no complaints there.
  11. In the spirit of  exploration and making-my-life-far-more-straightforward-with-only-one-unique-pilot, I opted to make ALL of my ships apart from the B-Wing Pilot Skill 4 - this had the wonderful advantage that I got to move everything at once and in an order of my choosing. I did come a little unstitched, however, when the imtimidating PS1 TIE swarm came on and I completely forgot that they'd move before me!
  12. Yes, that Rebel Transport was just terrain in this game: we were too tired to try to wrap our heads around the rules, and we've realised that we've got way more Rebel points at the moment anyway. In future though...well, watch this space.
Cheers,

- Drax.

P.S. Please forgive any typos - I'm still tired, and the kids have failed to grasp adequately or usefully the concept of gaining an hour as the clocks go back...

Tuesday 21 October 2014

469 - '6MMRPC' #8 - 3 Platoon Finished!

Hooray!

This is quite a significant milestone for me: I'll explain why when I've more time to post next week. For now, here are my newest PBI all finished at last (in all their clunky-cast goodness):


...And their current painting chart (squeeee!):
Back to work then...

- Drax.

Thursday 16 October 2014

468 - '6MMRPC' #7 - Minimal Progress is Still Progress, Right?

TELEGRAM FROM DRAXVILLE.
POST LATE. WORK BUSIER THAN HELL. NOT GIVING UP 6MMRPC THOUGH X-WING NOTWITHSTANDING. DULLCOTED FLAMES PLT. NOT WORTH PHOTO EDIT. PHOTO ADDED BY REQUEST.

DRAX.

P.S. X-WING TOYS PRIOR ARRANGEMENT. DON'T COUNT.