Hullo, All,
 |
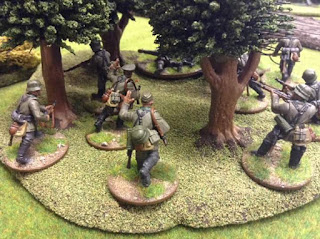
| The Heer advance...cautiously! |
I've been a busy beaver recently: not only have I got a bunch of modelling and painting done (details soon) but I've also been play-testing a scenario I wrote for Bolt Action. As I've played it twice now, rather than try to present two different battle reports as well as the scenario itself, I think I'll just outline the scenario in this post (with some pretty pics from Game 1) and then reflect on it in a follow-up post, with some pretty pics from Game 2 to illustrate.
The basic idea is that the attacker has to come on from two table edges to blindly advance to engage a defender whose forces are completely hidden practically anywhere on the table (marked on a map, rather than placed on the table) in order to take the centre ground. Both sides start with just half their units (either secretly deployed or in the first wave) and all else arrives from reserve. The attacker has a 20% points advantage and a preliminary bombardment on a 3+.
 |
| Some US Rangers, allied with Alex's British Paras. |
In the first game, I was attacking with my Heer against Alex's Paras...and I lost; in the second game I was attacking again, this time with my 4KSLI Brits against Steve's Germans...I won. (- although there may still have been a wee Tiger slinking around: see next post!)
Game 1 Pics:
 |
| The Heer continue to advance... |
 |
| ...but discover a US bazooka team... |
 |
| ...and that Hanomag didn't last long. Booo. |
 |
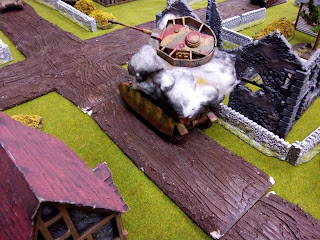
| In the centre, my Panzer IV trundles up the boulevard... |
 |
| And eventually - sadly - also falls prey to AT fire. Bazooka? Sherman? - Can't remember now?! |
 |
| ...and the Para sections started tabbing up to the crossroads. |
Meanwhile, on my right flank, another Hanomag edged up, and discovered a ruddy-great Para 17pdr dug in amidst the crops. Aargh!
I had some good news, in that I managed to neutralise the Paras' tetrarch...but that was about all:
On me centre-left, my assault pioneers tried to dislodge the Americans...and fluffed pretty much everything. Not least the flamethrower, which twice - TWICE - failed to do its sole job (below). Drat.
...and I love these two pics:
 |
| My boss does his best to push forward. - BELOW, MORE PRETTY PICS! |


...all of the Allied models, of course, are Alex's.
- Drax.
NB: Thanks again to Justin for the donation of his excellent pics!


Intense and great report, splendid terrain and figures!
ReplyDeleteThanks, Phil - it's always so lovely to get to play on a good-looking table with painted figs!
DeleteThat looked ace mate!
ReplyDeleteYou going to submit the Mission to Warlord?
No, Wargames, Soldiers and Strategy - should hopefully be well-received. Think I might just playtest it once more first, mind.
DeleteGreat AAR
ReplyDeleteThanks, Geordie!
Deletekingroot
ReplyDeletekingroot for pc
kingroot pc
direct download links for each device is given.
I was very encouraged to find this site. The reason being that this is such an informative post. I wanted to thank you for this informative analysis of the subject. shareit
ReplyDeletecartoonhd
This comment has been removed by the author.
ReplyDeletegörüntülüshow
ReplyDeleteücretli show
N0J2
شركة عزل اسطح بالدرعية zDBv323JIL
ReplyDeleteشركة مكافحة الصراصير بالجبيل NriVd0Lte0
ReplyDelete